Wednesday, July 2, 2008
6.0.4030.0.Lab06_n.030630-1724
Very little has changed since the publicly leaked 4029 MAIN build, however it is currently the earliest build I've seen to feature the "3D View" menu option, even though it's quite unusable and doesn't draw icons. The old stalwarts Carousel and Panorama can be enabled, similar to later builds.
I haven't shown much in the way of M6 builds so far, mainly because they mostly look the exact same, but hopefully I'll eventually document 4030.main, 4031.main, 4031.Lab06, 4032.Lab06 and some of the SKUs of 4038.main for the collectors. All throughout M6 the Aero Glass style was hidden and hackable into submission, but it wasn't until 4039 that it became easily enable-able, and that continued early on into M7 as can be seen in 4040 and 4042.
Friday, June 13, 2008
June Recap, Stats, Feedback! =)
We've had ~3200 page views so far, with the two biggest traffic sources being aeroxperience and TheVista.ru, with TheVista translating the posts from this blog for their readers. A great welcome to all our Russian visitors, and glad you are enjoying the site!
I've explained a little about the Longhorn VBLs (Virtual Build Labs), and had some rare, interesting information contributed. I also had a little mini-guide to extracting the WinPE version of a build from the disc.
Also, we've been through a few builds so far:
6.0.4002.Lab06_N(ntvbl06).030108-1926
6.0.4040.Lab04_N.030828-1910
6.0.4042.main.030905-1800
6.0.4042.Lab06_N.030909-1709
6.0.4066.0.main.040226-1010
6.0.4084.0.main.040527-0915
5.2.3790.1232.winmain.040819-1629
6.0.5001.0.winmain.040927-1610
6.0.5098.0.winmain_beta1.050628-1740
Thusfar, I think this blog has been successful, being able to bring a little bit of interesting information on Longhorn out to our readers. But what I'd really like is for some feedback! Do you have any comments/suggestions or even things you'd like to see more of on the blog? Please leave a comment on this post to share your thoughts, and spread the word!
Tuesday, June 10, 2008
6.0.4042.main.030905-1800
Looking at the two builds side-by-side, you could be forgiven for thinking they're completely different OSes. The MAIN build is quite clearly still using Milestone 6 code; the boot screen, welcome screen, wallpaper and shell are almost identical to 4040. The LAB06 build however, 4 days younger, is completely different visually, and is much more stable and usable.
Evidently this is around the time of the changeover to the newer Milestone code. Such is a massive engineering effort as all the labs are synced literally overnight as the new code is brought in. Anything that hadn't been reverse-integrated into main for the milestone is dropped. This explains why the LAB06 build is missing the experimental 3D features found in the MAIN build and other M6 builds; everything not stamped with approval for inclusion in the Milestone 7 code is shelved. That's not to say it mightn't be added back later - PDC03 showed us 405x builds with the "3D" view option put back in, and the 3D views are up and running again in 4066.
Without further ado, here are some shots of 4042.main. It's almost indistinguishable from 4040, so I left Aero Glass on its default opaque mode so the shots at least look a little different =)
LAB06 and LAB06_N
Monday, June 9, 2008
Longhorn Labs
Saturday, June 7, 2008
Omega-13
6.0.4042.Lab06_N.030909-1709
4042 is one of the first Milestone 7 builds, and it's instantly obvious. Sporting a new boot screen (see 4051) and welcome/secure desktop screen (see below), as you boot it up you can tell something has changed. A new wallpaper greets you, and shortly thereafter what was a brand new theme at the time - Slate.
All the M7 code has been checked in, and there's a dramatic increase in stability and speed. The shell is completely upgraded, bringing a much cleaner UI and better access to new features.
The amount of experimentation with features is kept low, only the most important Sidebar tiles remain in this build, and the "3D View" option in Explorer seems to be missing, thus making the Panorama and Carousel view styles inaccessible.
A new feature rears its head, stashed away in the WinSxS folder, StickyNotes. Unlike in the WinHEC 2004 build (4074), Stickies work off the bat by dragging an empty text file onto the StickyNote icon.
To top it all off, Glass has made the crossing to M7 unharmed, and is a lot more usable than in 4040. I give you, the first shots of the M6 Aero Glass borders applied to the new Slate theme!
Friday, June 6, 2008
6.0.4040.Lab04_N.030828-1910
Tuesday, May 13, 2008
HowTo: Longhorn WinPE (Windows Preinstallation Environment)
I've seen a lot of new sources pop up recently, so hi there to all the new people reading the blog =)
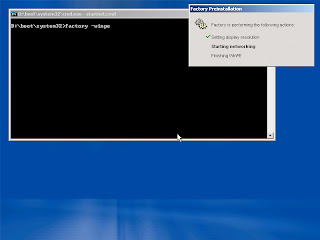
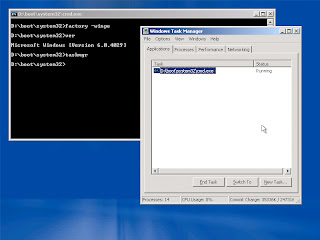
I'll take a break from the usual and talk about WinPE, the graphical boot environment featured on Longhorn builds starting with M4. In its simplest form, a WinPE is a version of a build of Windows that boots to command-prompt directly from CD, supports networking and other GUI tools. In Longhorn, WinPE launches the setup application which allows you to install the build, but you can easily access the command-line should you want to (Shift-F10 during setup).
With a little creative thinking, one can extract the WinPE of a Longhorn build without much trouble and make a standalone boot CD.
Firstly you'll need a version of ximage compatible with your build unless you're working with M6 or below. For Longhorn M7 builds you will need ximage 4059.0, available with a little searching on the web.
For this example I'll use Longhorn 4029, an M5 build.
Create a folder structure on your hard disk,
C:\4029PE
Copy the "boot" folder from the 4029 CD into this folder. It should be about 150-200Mb in size.
Copy "win51", "win51ip" and "wimbom.ini" from the CD to C:\4029PE
Copy "setupldr.bin" from the C:\4029pe\boot folder and rename it to C:\4029pe\ntldr
You will then need to create a bootable CD of the C:\4029pe folder in the software of your choice. I use Microsoft's cdimage utility from ReflectiaX's longhorn boot fix pack, one can use mkisofs on Linux or Mac, or something like Nero. Specific instructions for this are beyond the scope of the article, but use the following file as your boot image (about 4Kb).
http://rapidshare.de/files/39399696/boot.bin.html
Once you're finished you should have a bootable CD or ISO about 150-200Mb in size. Try it in a virtual machine, it should boot to a command prompt. Simple really =)
With an M7 build, the WinPE part is contained within the "install.wim" file as the first entry. You must extract it using ximage, and then ISO it and make it bootable as described above. Sometimes there are catches, and some builds may require manual tweaking to get right (4085's NTDETECT.COM, an essential file, doesn't work quite right when made into a WinPE like this so it would need to be replaced with a working one, from 4084 for example).
There you have it, a quick'n'dirty guide to creating a bootable WinPE disc.